I am a big fan of portfolio projects that have a purpose…do good things for others. I created this video in a collaborative volunteer project with UMACHA.org. It was a problem I have solved often in my recent work, creating a visual short educational video to replace an aged lengthy webinar.
The Training Director and I worked closely as I interpreted their two-year old webinar. Together, we validated my outline, script, new theme, and visuals were on track with her current goals for the AAP program. For visuals, I worked with the Marketing team to shop on Big Stock for graphics that fit the Midwest audience and theme using their current subscription. I used my own home sound recording studio for narration. I used Camtasia and PowerPoint plus kept the design very simple so I could turn the source files over to the Training Director at the end of the project for their own use. Files were shared via Google Drive and YouTube.
Frequent checkpoints with key stakeholders pay off. When the video reached the final stage of being reviewed by the Board, it passed with applause and no changes requested. It now sits on their website for their members, and it has served them well this year!
In the last few weeks, I have been exploring podcasting for myself and others, so this blog is to share a few tips with you about the first stage.
I have been producing audio for videos for a number of years. Personally, I am interested in seeing if podcasting might be a good channel for producing fast, high-quality, cost-effective eLearning.
In my project, I am working with two teams of people who are new to audio production and podcasting. So today, I will share with you some of the things I’m sharing with them as we travel down this road.
Content
To start, we need written content, a script, a set of interview questions, a person to interview, a theme or topic. Some people can start with an outline, and make things up as we often hear in a webinar, live radio show or live podcast. Others have a formal message to convey, so they do better with a carefully curated written script.
In all of the cases I am working with today, we have good ideas for content based off blogs, training webinars, and live events. We are simply using podcasting as another way to share our message.
For today’s example, I wrote a short speech about Dr. Pat Selinger for PDXWIT.org for their October Happy Hour. So, I simply reused that speech to create this sample podcast.
Microphone and Sound Booth
To start, a quality microphone make a big difference. I learned this lesson the hard way. You get what you pay for in microphones. A poor quality mic increases one’s editing and recording time. A few years ago I spent about $150, and I own a professional Blue Yeti mic with pop filter. I am doing a prerecorded podcast that matches my video work, so I have my sound booth (version 3) set up in my office closet complete with padded walls and ceiling. The sound booth cost very little. It was mostly a matter of gathering things around the house to make a padded space to eliminate echo and ceiling noise. Closets full of clothing are an easy way to start.
Sound Editing Software
To keep it simple, I used my familiar video editor, TechSmith’s Camtasia, to produce this file. There are other software solutions for sound editing that I will explore in later blogs.
Adding Music
Music helps the listener in so many ways, giving them auditory cues as well as bringing emotion to the audio. Professional podcasts often use music as cues in their show, and some may use sound effects to add additional interest.
Sometimes, I find it helpful to restrict music use in an audio track, to only use it to cue the listener, in order to leave the narration clear and crisp. This technique can be especially important if you have a wide variety of listeners from many geographic regions.
In this sample, the topic is light, and I wanted to add emotion. So, I placed the music throughout the audio.
TechSmith provides royalty-free music snips, so I listened to a number of them until I found the right match emotionally for the topic. Then I brought the music track into Camtasia, and I carefully edited it down to the right length to match the narration listening for beats and music cues.
I’m an amateur keyboard musician, and a long-time music lover. So, I’m sensitive to how the music sounds, and I want each fade and increase to happen at a time pleasing to the ear. It is a little detail, but one which increases the quality of the audio experience.
Producing the File
Once I had all those pieces in place, I rendered the file in an audio-only format M4A, a process that is much faster than producing a video file. There is some debate in the podcast world about MP3 files vs the newer M4A files. My tool, Camtasia, no longer produces MP3 files, so naturally I went with what I had, M4A format.
There are more details in producing a file I will cover later. For example, the actual file size is determine by the quality you select in production. I’ll speak to those topics in a later blog, because one’s choice of media server can help with these choices.
Publishing the File
Today, I published the audio file within my WordPress blog as a simple sample. I have recently upgraded this blog to a paid subscription that eliminates ads. Upgrading also allows me a small amount of audio and video storage.
That is not the end of the story on publishing podcasts. There is much more to say about preparing the file, publishing podcasts on a media server, and distributing them, also voice recording and audio tips. So I will return to blog more on those topics soon!
Engaging your audience is critical for designing effective documentation, videos or online training. With needs analysis, you can build the right tools at the right time, saving hundreds of hours of rework or waste.
Here is a recent example. Not long ago, I was told by a leader in product development to build an internal training video on a new software feature in our software-as-a-service or SaaS offering. We had added the feature to stay competitive, and we were charging clients an extra fee for it.
I know video projects can easily take 50 to 75 hours. So, I set out to engage and meet the end users of the video. I found the product owner plus team leads in implementation, sales and support teams. I asked “Are you interested in a video on this topic?”
I found out there was only one client purchasing the new feature, a pilot client. A handful of people were engaged with the pilot client, including the product owner who already knew a great deal about the new feature. Within the largest teams, the implementation and support teams, the team leads told me this feature was simply too new to learn because it was not being used by the majority of clients.
I also knew from my own experience working in software companies that a new feature is subject to change, just like the first model of a car rolling off the factory line. Based on the pilot client’s feedback, the feature itself could be very different in a few months, both in workflow and appearance. Building a video too early might mean hours of redoing and adding content later.
In this case, instead of making a video, we simply made sure all product documentation was in place for our teams. The marketing team assembled a short slide deck to help our sales team explain and sell the new feature.
Then we waited for client adoption. I always keep proposal backlogs, and I kept checking back every month to gauge client interest on this feature. Once the pilot client had successfully implemented the feature plus a number of clients were starting to buy it, it was time to start making the video. I engaged the pilot team plus the product owner, and we made sure the original release documentation was updated based on what we learned in the pilot. I then produced, released, and advertised the new feature video with many successful views, because it was the right tool at the right time.
Building a piece of documentation, a video, or an online training course is often done without a direct connection to the audience. This may seem like an easy way to do the job. We just go build it, and keep our fingers crossed that someone uses it. I have seen this pattern over and over in different jobs, similar situations.
However, there is a great deal of risk in this method, and often many hours wasted. What if we spend 50-100 hours to build something too soon, and then we have to rebuild it again in a few months? What if the new feature cannot be sold for a year or is sold to only a few, reducing the value of the product documentation, video or course?
Engaging your audience and asking a few more questions before you start a large project is the smart and efficient way to go.
A quick video that explores a creative problem solving technique I use often in my instructional design work when organizing content, writing scripts, or designing graphics.
When I learn any new tools or techniques, I always assign myself a short project. This project started with my desire to explore the challenges in upgrading to the latest Camtasia platform. With most tools being simplified or moved to unusual locations, I challenged myself to work through each road block.
This project showcases graphic techniques for learning, which I found reinforced in my recent reading of a short book by Connie Malamed, Visual Language for Designers. The graphics are designed to reduce the cognitive load and allow for faster transfer of learning from short-term to long-term memory. See The eLearning Coach for Connie Malamed’s podcasts, books, and helpful blogs.
When I work on small portfolio projects for myself, it is outside the realm of external influences and standards. With such freedom, I had fun brainstorming and designing for this topic. Still, one cannot go off the deep end. I designed each element for continuity and consistency with this video’s theme. I had to ensure the video fits with my existing video collection. Notice the use of the following elements:
fonts, music, transitions, and background choices to fit the theme
colors with meaning
the consistent hat theme for reinforcement
original simple photos, graphics, and video
reinforcement techniques in presenting labels and text graphics
use of casual tone, friendly, humorous voice work
Throughout the video, I strove to keep things very simple so the viewer could interpret and apply the theme to their own world. My own methods vary greatly. I might collect information commuting on a train, organize sources in Google Suite, visualize in PowerPoint or Visio, and wake up to capture bright ideas at 2:00 am in my phone. Those methods work for me. With this simple paper theme, the method should become less relevant. Each viewer can find their own way to apply the concepts.
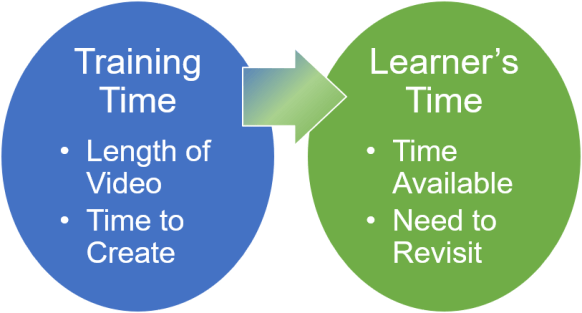
What if we thought of in terms of learner’s time when designing video content or online courses? Can we increase engagement and adoption in what we produce?
In my last job, I was hired to set up a new video program for a product documentation team. A few pilot videos 20-30 minutes long had been created by the team to start the program. The pilot work included tracking production hours to show a rough relationship between length of content and production.
I decided to find out what the audience needed. The learners consisted of software developers, systems engineers, and client-facing teams (sales, implementation, and support teams). Everyone had heavy workloads, so learners had just a few minutes between meetings, production tasks, or urgent client requests to watch a video.
After learning about the audience’s time constraints, I then questioned the idea of a 20-30 minute video. Would viewers commit to a lengthy format for every video? Or was the length of the pilot videos a measure of success for our team before needs analysis?
I then set out to establish a new condensed video structure based on our audience’s time constraints with an overall goal of 10 minutes or less for new videos.
To condense content, I focused each short video on solving a core problem. I often used expert-led webinars as sources. By focusing on the core problem, it was easy to cut 30 minutes of wordy lecture to 10 minutes of video. In some cases, I restricted the video content to concepts, and then led the learner to read guides for the details. In certain cases, content proposed for one video could be moved into two or three smaller videos.
My audience was dealing with a wide variety of new information daily plus many distractions, strong barriers to retention. The learners had strong need to be able to stop and start the videos or return to the videos many weeks later for reinforcement. To increase retention, I added structures within the 10-minute videos to divide content into smaller 1 to 2-minute segments.
By reducing time commitments for the busy audience, I was building videos with concise, focused, quality content. Learners and their leaders commented with enthusiasm on the short value-packed format. In our reports, I could see how much viewers enjoyed the content. They would often watch one small video, then voluntarily watch a second or third video in a row.
I found a few side benefits on the production side. With a shorter format, I could ensure steady stream of new releases and revisions. Experts were more likely to participate in quality reviews. Plus I found locating and reusing content was faster in smaller project files.
Redesigning for the learner’s time constraints turned out to be a win-win for myself, my team, and for my audience.
Be sure to check out this excellent article from Chris Larson at TechSmith. Chris breaks down needs for those of us creating videos and compares three popular online video platforms (OVPs):
YouTube
Vimeo
Screencast
Chris starts with the basics in flow and comparison charts, for example, which platforms allow commercial content. Plus he delivers helpful background information like explaining the high definition video problem, that is, how some platforms substitute low resolution versions that may fail to preserve clarity on screencasts and PowerPoint slide graphics. Low resolution might not matter on a cat or dog video, but it can make an educational video useless.
Revisions are a natural part of managing any video library. We all want consistent content that is easy to manage and distribute, so Chris reminds us of a few key points. Can you replace videos without disturbing the URL? How about the ability to create private links or password-protected links? Many of us highly value the ability to create draft storyboard videos or to share our content in a limited manner when conducting expert or peer reviews before the final release.
Most of us choose our video platform in order to store and deliver large video files, and our content needs can escalate quickly. What level of storage works for you? Is retention length for inactive content a concern for you?
Knowing your intended audience and what they expect helps us make better choices. Do you want ads or monetization? Does your video contain copyrighted material? Do you need a platform with a large consumer audience and analytics?
Overall, I found this TechSmith article a compelling read that drew me in with the three platform comparison, and kept me engaged with the facts and figures. Many thanks to Chris Larson for writing it, plus to Wendy Hamilton at TechSmith for sharing it on LinkedIn.


 Be sure to check out this excellent